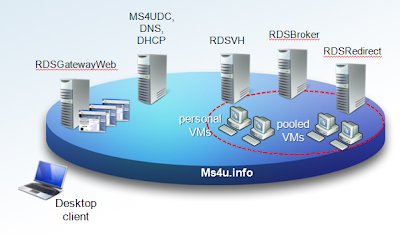
Below is the figure of the infrastructure setup:-
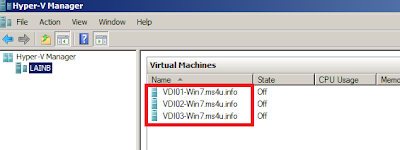
By using Hyper V R2 and SCVMM 2008 R2, I have created the following Virtual machine

In this setup, I'm going to use Windows 7. You can setup client VM running on
○ Windows 7 Business, Enterprise or Ultimate,
○ Windows Vista with SP1 - Business, Enterprise or Ultimate,
○ Windows XP Professional with SP 3
I have tested on these above operating system and it work like a charm. If you would like to know more about the different between Personal and Virtual Desktop Pool, To make it more interesting, VDI01-Win7.ms4u.info is set to Personal Virtual Desktop and assigned to VDIUser1 which only use Office2007 whereby the Virtual Desktop Pool will use Office 2010 (Beta).
The Client VM name on the Hyper V host should be FQDN and identical as the computer name in the VM.
Example: VDI01-Win7 is the computer name
VDI01-Win7.ms4u.info is the FQDN
For easy and faster deployment of the VM, I using VMM feature called "Rapid Provisioning Virtual machine using Template". For those who are not familiar with this feature,
Let start to look into initial configuration:-
MS4UDC - Domain controller
You may want to take note on some criteria to deploy personal virtual desktop . Your Active Directory need functional level running in Windows 2008. To use the added functionality provided by the Personal Virtual Desktop tab in the User Account Properties dialog box in Active Directory Users and Computers, your functional level for AD DS must be set to Windows Server 2008 R2.
Task 1:- Create user account for VDI
1. Log on to MS4UDC VM
2. Go to Start > Program > Administrative Tools > Active Directory Users and Computers
3. Right click Users container , select New and User
4. Enter username :- vdiuser1 and click Next
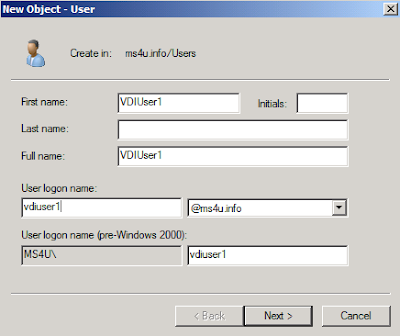
5. Enter password :- P@ssw0rd , uncheck "User must change password at next logon" and click Next
6. Click Finish
7. Repeat step 3 to 6 to create user account for vdiuser2 and vdiuser3.
Task 2:- Create a group for VDI
1. Right click Users container , select New and Group
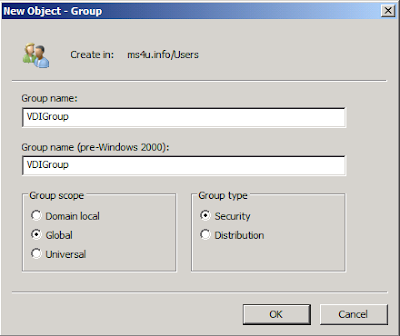
2. Enter the group name: vdigroup with Group scope:- Global and Group type: Security and Click Ok button
Task 3: Assign user account to VDI group
1. Right click Vdigroup and select Properties
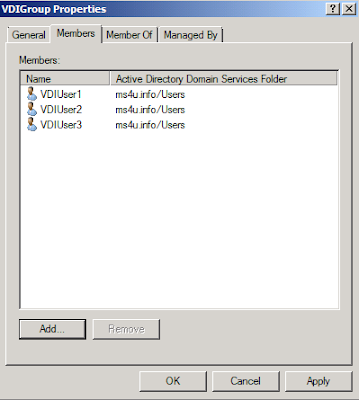
2. Click on Members tab and select Add button
3. Enter vdiuser1,vdiuser2 and vdiuser3 and Click Check name
4. Click Ok button
5. Click Ok button to close the vdigroup properties
This is the last post for 2011 :-) Stay tuned for more updates on an Upcoming Year and HAPPY NEW YEAR 2012 :-)
Cheers !!
Jagadeesh